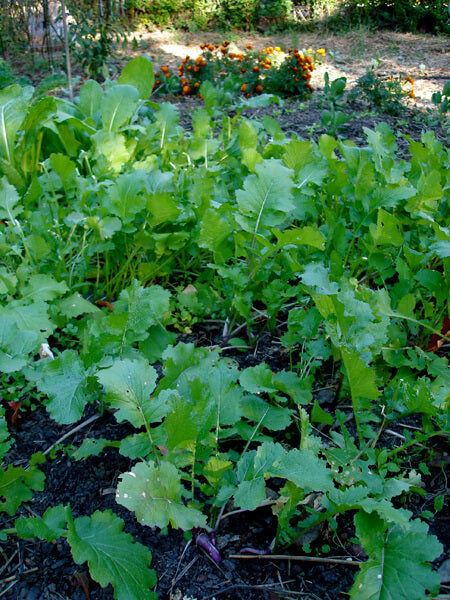
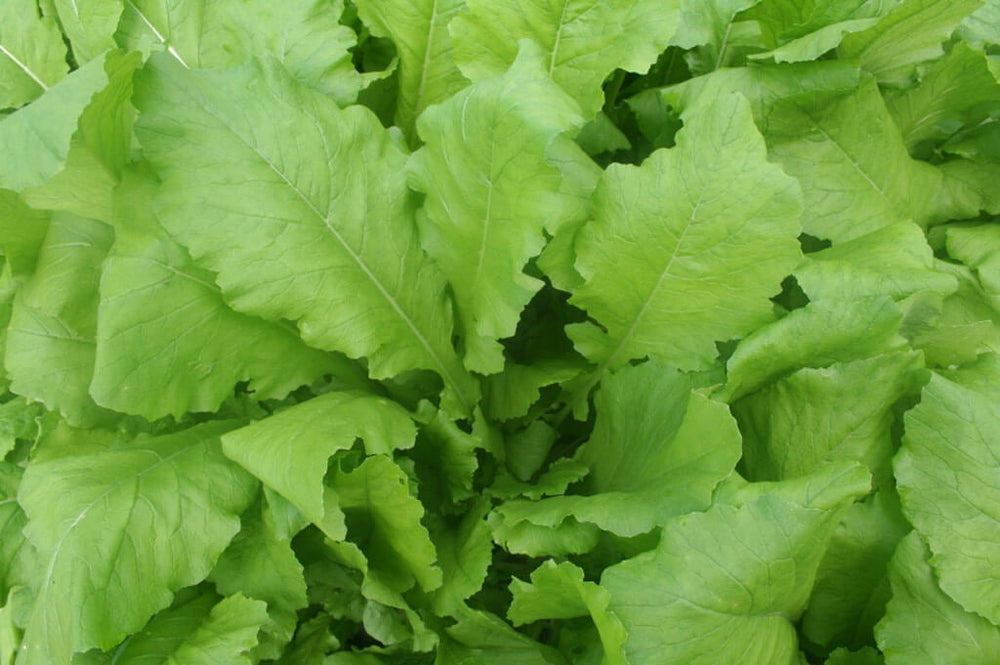
Turnip greens are extremely easy to grow, especially in fall. As nights get longer and cooler, turnip greens become crisper and sweeter. Best of all, a new flush of tender leaves will grow after each picking, with plants remaining productive at least until the first hard freeze, and sometimes beyond.
They also grow in spring, but plant them early. Lengthening days trigger turnip plants to produce flowers and seeds instead of new leaves. Also, a few days of hot sun can make the greens taste strong and bitter in regions where spring gets hot quickly.
If you grow turnip green varieties designed for leaf production, the plants may also produce turnip roots, although not necessarily of high quality.
Quick Guide to Growing Turnip Greens
- Plant your fall turnip greens from late August to October; for a spring crop, plant 2 to 4 weeks before the last frost.
- Space these easy-to-grow greens 6 inches apart in fertile, well-drained soil with a pH of 5.5 to 6.8.
- Give your native soil a hand by mixing in several inches of aged compost or other rich organic matter.
- Leafy vegetables need consistent water to produce delicious, tender leaves; use a soaker hose or drip irrigation to keep plants happy and hydrated.
- Keep turnip greens fed by giving them a water-soluble fertilizer regularly.
- For the best flavor, wait to harvest turnip greens until evening temperatures dip into the 40s or below.
Soil, Planting, and Care
Turnip greens are easy to grow in any well-drained soil. Set out turnip green plants 2 to 4 weeks before the last frost in spring and from late August to October for a fall crop in most areas. In zones 9 and 10 they can be planted throughout fall and winter.
Like collards, kale, and other greens, turnip greens need to grow fast to produce nice, tender leaves. They aren't too fussy about soil, growing well in a soil pH of 5.5 to 6.8, and doing okay even in poor sandy soil. Ideally, though, you should enrich the ground with compost or aged compost-enriched Miracle-Gro® Performance Organics®All Purpose In-Ground Soil before setting out plants to improve soil texture and nutrition.
Set plants 6 inches apart, and do not try to thin or separate seedlings if there are several in the container. Turnip greens don't mind growing in small clumps as long as each little group has ample elbow room. Although they are a variety that will make turnips, don't expect great roots from crowded plants. They are sown with just the leaves in mind.
Turnip greens need steady water in order to thrive, so Miracle-Gro® Performance Organics® Edibles Plant Nutrition. This plant food works in harmony with In-Ground Soil to provide just the right nutrition to fuel more growth as you harvest leaves.
Troubleshooting
It is natural for older turnip leaves to turn yellow and wither. Removing older leaves every week or so encourages the plants to grow more greens.
Watch greens for occasional aphids or mites, which can be controlled with insecticidal soap spray. Small flower beetles or other chewing insects will sometimes make harmless holes in the leaves, but aphids and mites can ruin your harvest.
Harvest and Storage
The ideal time to begin eating turnip greens is when nighttime temperatures are in the 40s or cooler to bring out the sweetness in the greens. Greens that grow in hot weather can taste strong and bitter, especially to people who haven't honed a taste for them. Turnip greens are a little more pungent than collards. You can pick leaves one at a time, or use a sharp knife to gather big handfuls. Plants that are cut back about 2 inches above the top of the root will grow a new set of tender leaves in only 2 to 3 weeks.
Be sure to wash greens thoroughly to remove any soil. The easiest way is to put the leaves in a very large bowl or clean bucket of water and swirl it around so that any soil falls to the bottom. Repeat until the leaves are clean. If you grow a bumper crop, keep a big galvanized tub expressly for this purpose. It is best to cut greens just before you cook them, but they will keep in a plastic bag in the fridge for a few days. Extras can be steamed and frozen. Any sizable turnip roots that form can be cooked along with the greens.


FAQs
Is there anything special I should do to the soil to prepare for growing turnip greens?
Greens grow best and produce the most flavorful leaves when raised in loose, moisture-retentive soil. Prepare planting beds by turning soil to a depth of 12 inches and working in compost.
Can I tuck some turnip greens along the edge of a flower bed?
The only thing to remember is that you want to be able to reach all the way around each plant to allow for easy picking. Try to leave at least 6 to 12 inches between turnips and surrounding plantings.
Can I pick turnip greens and still harvest the roots later?
If you intend to harvest roots, make just a few pickings of leaves early in the season. Picking greens too long into the growing season can stunt the roots. Once bulbs start forming, avoid disturbing the plants.
When should I start harvesting turnip greens?
Start picking leaves after they reach 4 to 6 inches tall. As long as you stick to harvesting the outer leaves, the tops will continue to re-grow.
I was weeding yesterday, and today the turnip greens are wilted, even though the soil is moist. What is going on?
Turnips have shallow feeder roots. As you weeded, if you chopped into soil deeply with a hoe, you might have sliced some turnip roots. Mulch around wilting plants with an organic material (straw, pine needles, chopped leaves, grass clippings) to conserve soil moisture and help protect undamaged roots. Harvest larger, outer leaves from plants that are wilting. This will give existing roots fewer leaves to support. Keep the soil moist, and plants should recover. In the future, hand-pull weeds around greens or go after weeds when they're young and tender, so that a gentle scuffle of the hoe removes them.


 Herbs
Herbs
 Vegetables
 Fruit
Fruit
 Flowers
 Succulents


