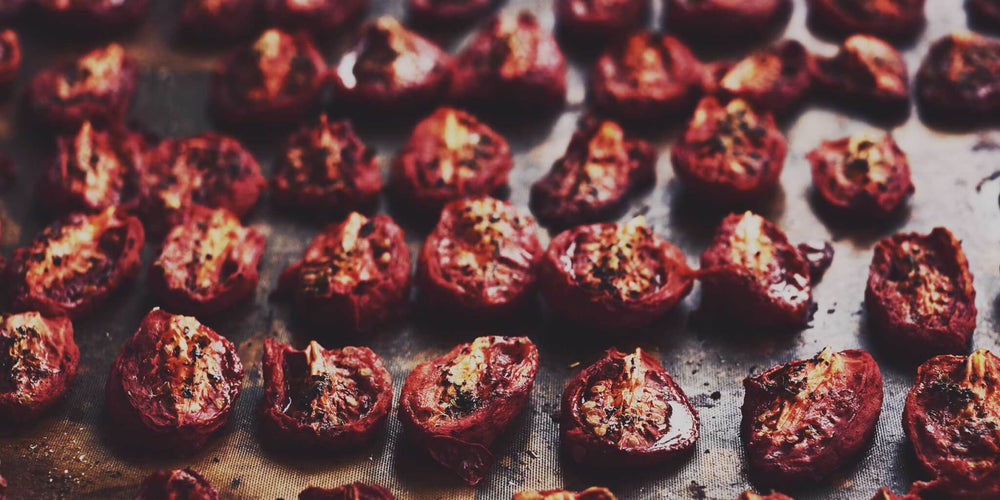
Drying is one of the oldest food preservation methods, since the simple act of removing the moisture helps keep decay at bay. There are some definite benefits to this method: Dried food doesn't have to be kept cold (thereby taking up valuable freezer space) and it requires minimal real estate in your cupboard. Plus, when food is properly dried, it will retain most of its nutritional value (though any vitamin C is usually lost). Drying food does involve some experimenting, though, as the process is more "find what works for you" than hard-and-fast recipe.
What You Can Dry
Vegetables, including:
- asparagus
- green beans
- broccoli
- cabbage
- cauliflower
- peppers
- corn
- eggplant
- okra
- onions
- peas
- greens
- squash
tomatoes (especially the meaty Roma type)
Fruits, including:
- strawberries
- grapes
- apples
- peaches
- pears
- most herbs

Equipment you may need
- Screens and/or cheesecloth
- Electric dehydrator or an oven that can be set to 140 degrees F (plus oven thermometer)
- Oven thermometer
- For blanching vegetables: citric acid, stock pot, cheesecloth or mesh bag
Drying methods
Sun Drying
The only foods safe to sun-dry are fruits (including some tomatoes) with high acid and sugar content. For outdoor drying, you need a series of hot (at least 85 degrees F), dry, breezy days with low humidity (less than 60 percent). Food is thinly sliced and laid on screens made from stainless steel, plastic, or Teflon-coated fiberglass and left in the sun to dry. This method is most effective in the desert Southwest and southern California.
Air Drying
Herbs are typically air dried. Bunch them together and hang them upside down, or lay sprigs or individual leaves on screens. Either way, air drying works best when done in a dark, warm place.
Electric Dehydrating
Dehydrators can be used to dry vegetables, fruits, and herbs. Choose one with a thermostat to control heat and a fan to circulate warm air around food. Dehydrators work best in a well-ventilated room, and you'll want to rotate trays according to the manufacturer's instructions. To dry, slice food thinly and place in single layers on trays.
Oven Drying
Don't have a dehydrator? Some newer ovens have a dehydrate setting (check your instruction booklet). Set your oven to dehydrate, if possible, or to 140 degrees F (use an oven thermometer to be precise). Place thinly-sliced veggies or fruit in single layers on baking trays lined with parchment paper. Shift trays top to bottom and front to back every 30 minutes, and monitor food to prevent scorching. Or use a pizza screen that allows good air circulation around the food; rectangular, rack-size screens allow you to dry a lot at one time. (Note: An oven is less energy efficient for drying than an electric dehydrator.)
3 secrets to successful drying
- Use just enough heat to drive moisture out of the food without cooking it
- The air should be dry to absorb released moisture
- Enough air must be circulating to remove moisture from the drying area


Blanching
Before drying, blanch most fruits and vegetables in a solution of water and citric acid (check your recipe for the correct ratio) to stop microbial activity and prevent food from darkening. Then, dry produce thoroughly with a towel.
Drying temperature
The ideal drying temperatures for most foods are between 120 and 140 degrees F. Too-high temperatures cook the outside of the food, so moisture has a hard time escaping and inner layers remain moist. On the other hand, too-low temperatures allow bacteria to grow.
Many modern ovens can't be set below 170 degrees F. You can attempt to dry food in this type of oven if you keep the door open and turn the heat on and off, as needed, to maintain proper temperature (use a reliable oven thermometer to track temperature). Turn the oven off near the end of drying time to prevent scorching.
Storing dried food
Store dried food in a cool (60 degrees F), dry, dark place. Dried foods absorb moisture from the air, so storage containers must be airtight. Glass jars, food storage bags, plastic containers, and vacuum packing work well. Dark containers protect dried items from light; you can also store dried foods in a dark place, or in the freezer.
Store dried foods in average-use portions to limit the number of times you have to open and close the container. Stash individually wrapped servings inside a larger container to limit air exposure for the entire batch.

Drying tips
- Fully dried vegetables should be crispy or brittle, and may even shatter like a potato chip. Vegetables usually require 6 to 16 hours to dry completely.
- Adequately dried fruits should be pliable without being sticky. Tear a piece in half; if moisture beads along the tear, it's not dry enough. Fruit usually requires 12 to 48 hours to dry completely. Under-dried foods spoil. Over-dried foods lose both flavor and nutrition.
- Many foods require specific pre- and/or post-drying treatments. Check out these guides from the University of Georgia Cooperative Extension and the Colorado State University Cooperative Extension for details.
- Cool dried foods completely before storing to keep condensation from forming.
- Pack dried foods into containers tightly, but without crushing.
- Dried food has a more intense flavor than fresh, so expect to use less when seasoning dishes.
- To rehydrate dried food, follow recipe directions. Rehydrated food doesn't store long, though, so only rehydrate what you need.
- Dried vegetables typically work best in soups, sauces, stews, and casseroles.
- Plan to use most dried foods with one year, but always check recipes for recommended storage times.
Article written by Julie Martens.



 Herbs
Herbs
 Vegetables
 Fruit
Fruit
 Flowers
 Succulents
