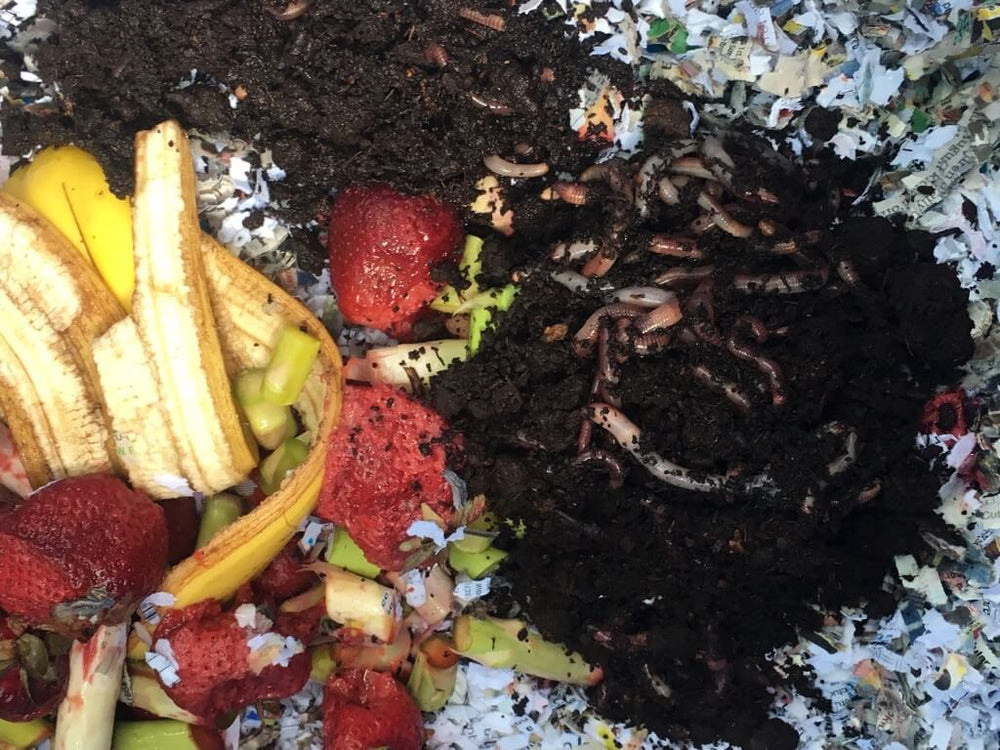
Most of us know that composting benefits both our gardens and the environment. After all, we're turning food scraps into soil nutrients instead of clogging landfills. But what if you could produce compost that's even more nutrient-rich to grow lush, productive plants—with minimal effort, space, and expense—and enjoy your own "pets" at the same time? Welcome to the world of worm composting!
What is Worm Composting?
Also referred to as vermicomposting or vermiculture, worm composting is just like it sounds: using worms to break down organic waste into high-quality compost. As food passes through the worm's digestive system, it's enriched with good bacteria and microbes. The end result (if you will) is called worm castings. True, that's just a fancy name for worm poop, but the castings are actually odorless. Here's why they're so valuable: They will enrich your garden soil with loads of nutrients, can help balance the soil pH, and contain lots of water to help keep your plants hydrated.
How to Build a Worm Composting Bin
Building a worm composting bin (or vermicomposter) offers an easy way to produce your own worm castings. Best of all, you only need a few supplies and about 10 minutes to set it up. Gather these items:
- 2 opaque storage containers*
- 1 lid for the top storage container
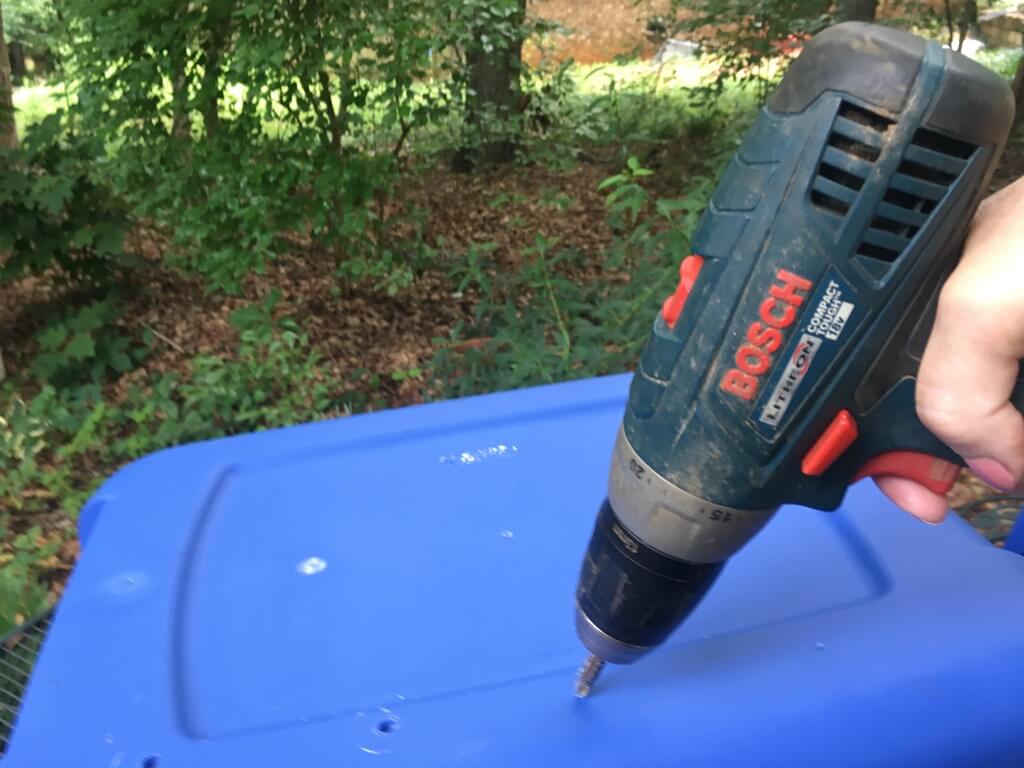
- Drill and ¼" drill bit
- 2 bricks, rocks, or other water-resistant objects for spacers
- Water-permeable fabric or fine-meshed screen, cut to fit the bottom of one storage container
- Shredded cardboard, shredded newspapers, a scoop of garden soil, or compost to create bedding
- Food scraps, including vegetable and fruit peelings, coffee grounds, tea bags, and/or crushed egg shells**
- Approximately 1 pound red wiggler worms (get them at feed and seed stores, fishing supply stores, or online)
* Don't use clear containers, as worms dislike light.
** Don't include meat, dairy, oils, onion, garlic, or more than just a bit of citrus. Worms dislike strong flavors, and meat, oils, and dairy should never be added to compost.
Before you begin, figure out where you'll keep your worm bin. Look for an area that's fairly dark (definitely out of direct sunlight), with temperatures between 59 and 86 degrees F. A dark corner in the basement is ideal.
Here's how to assemble your worm composting bin:
- Flip over one of the storage containers and drill 3 rows of evenly spaced holes along the bottom, approximately every 4 inches.
- Drill a row of holes approximately 2 inches from the top of the same container, spaced every 4 inches. These will help provide oxygen for the worms. Set the container aside.
- Put the bricks or rocks in the bottom of the second container to act as spacers between the containers.
- Place the first container (the one with holes) inside the second container, so the bottom rests on the spacers.
- Line the bottom of the top container with the water-permeable fabric or fine mesh screen.
- Moisten the bedding materials with water, squeeze out any excess moisture, and place inside the top container.
- Add a small amount of food to the bedding material.
- Put the worms in with the food and bedding.
- Place the lid on the top container.
- Let the worms go to work!

How to Maintain a Worm Composting Bin
Check on your new production crew often, and wait until the worms process most of the food scraps before adding new treats. Also, try to match the amount of food scraps to the quantity of paper bedding. Finally, make sure the bedding remains moist, and remove the liquid that collects in the bottom bin every 2 or 3 days. Pretty simple, right?
Worm Composting Troubleshooting Tips
If your worm bin starts smelling funky, you're most likely feeding the worms too many scraps for them to process. Be sure to wait until the food in the bin is nearly gone before you provide more scraps.
If you notice worms trying to escape through the bin holes, make sure the bottom fabric or screen is still in place.
If your bin becomes overcrowded with worms, either start a second composting system or share worms with friends. Another option? Make some money selling the extra worms!

How to Harvest Worm Castings
Once the bin begins to fill with worm castings, it's time to harvest them. Spread out cardboard or newspaper on a flat surface, in an area out of direct sunlight. Carefully remove the top bin and take off the lid. Turn the bin on its side and gently scoop the contents onto the covered surface. (If you're squeamish, wear a pair of gloves or hire a 6-year-old to help.) Carefully separate the worms from the worm castings, setting them to the side or placing them in a bucket to keep them contained. Once you've removed all of the worms, you'll be left with plenty of worm castings to feed your plants! Before heading to the garden, make sure to reposition the water-permeable fabric or screen in the bottom of the bin, add fresh, moist bedding and food, place your composting crew back in te container, and snap the cover on tight.
Now, sit back, relax, and let your pet worms work hard to improve your garden!
Article and images by Julie Thompson-Adolf.



 Herbs
Herbs
 Vegetables
 Fruit
Fruit
 Flowers
 Succulents
